There’s a little secret in the world of pantry perfectionists that might just blow your mind – or rather, suck the air right out of it. Are you ready to dive into the game-changing world of storage where how to vacuum seal a Mason jar becomes the hot topic at every dinner party? Well, buckle up, because we’re about to preserve pantries like it’s nobody’s business and turn your food storage into an airtight food storage fortress.
Gone are the days of stale snacks and flavorless fest. It’s time to embrace the Mason jar vacuum sealer, your new best friend in the kitchen. With a symphony of suction, this nifty device will lock in freshness, banish oxygen, and send your dry goods into a state of blissful preservation. So, let’s cut to the chase and seal the deal – because your pantry’s about to get a whole lot cooler (and you don’t even need a fridge for it).
Why You Need a Mason Jar Vacuum Sealer
Let’s be real: Who doesn’t want their pantry to be the envy of the cul-de-sac? Achieving that level of food preservation prowess means zero-tolerance for spoilage and staleness. Enter the hero of your kitchen saga—the Mason jar vacuum sealer. Say goodbye to waste, and hello to taste!
The Basics of Vacuum Sealing and Food Preservation
Picture this: a world where your dehydrated peaches and hermetically sealed hazelnuts maintain their just-picked flavor for months. Sounds like a dream, right? Well, pinch yourself, because with the wonders of vacuum sealing benefits, that dream becomes a drool-worthy reality. By sucking the life out of the air—and along with it, the nefarious bacteria, yeasts, and molds—you’re giving your food a passport to longevity. You’re not just storing; you’re enshrining freshness.

Extending Shelf Life with Simple Sealing Techniques
Hold up, don’t get it twisted—it’s not about working harder, it’s about working smarter. A deft flick of the wrist, the gentle whoosh of the vacuum sealer, and viola! You’ve extended your food’s invite to the pantry party. You want food preservation that whispers elegance and screams “savvy consumer.” Not only are you locking in flavor, you’re also locking out freezer burn, the arch-nemesis of the discerning food hoarder.
| Food Item | Shelf Life: Regular Storage | Shelf Life: With Vacuum Sealing |
|---|---|---|
| Dehydrated Fruits | 4-12 months | 1-2 years |
| Coffee Beans | 1 month | 1 year |
| Dry Grains | 6 months | 2-3 years |
| Herbs and Spices | 1-2 years | 4-5 years |
So, isn’t it time you jazzed up your jars with the airtight allure of vacuum sealing? With each seal, you’re not just extending food shelf life; you’re chanting an incantation against the dark arts of decay. Remember, your pantry is your kingdom—rule it wisely.
Vacuum Sealing Without the Heat: An Overview
It’s like discovering the superpower of preserving freshness without having to simmer, boil, or sweat over a hot canning process. Welcome to the realm of non-heat vacuum sealing methods, where the tantalizing aromas and delectable tastes of your dry goods are locked in with nothing more than the absence of air. But how, you wonder, does one tap into this wizardry of oxygen-free storage solutions? It’s simple, really – a vacuum sealer with a Mason jar attachment is your wand, and the resulting magical concoction is dry goods preservation at its best.

Picture this: the sealer sucks out the life force that ages your food – yes, we’re talking about oxygen – and the metal lid clamps down like a protective shield. No heat wave necessary, your morsels and grains are secure from the ravages of time, and as an added bonus, you’ve saved energy. Quite the conservationist, aren’t you?
Allow yourself a glimpse into the future of your pantry, as we chart out the perks of this cool sealing sorcery:
- Flavor fidelity – your spices won’t turn into bland shadows of their former selves
- Moisture maintains its distance – goodbye, mold and clumping
- Longevity in your pantry increases – your grains won’t betray you by turning stale
Now let’s peek at the scoreboard that pits non-heat sealing champions against traditional heat hogs:
| Sealing Method | Energy Efficiency | Flavor Preservation | Durability |
|---|---|---|---|
| Non-Heat Vacuum Sealing | High | Exceptional | Long-term |
| Traditional Heat Canning | Lower | Good | Shorter-term |
Fancy a world where your beans and herbs keep their piquancy and your cereals crunch for an eternity? Embrace the non-heat sealing spell, and the mystical force of vacuum sealing will envelop your pantry items in an impenetrable barrier against the mundane forces of decay. Cherish the freshness, relish the longevity – because you, wielder of the vacuum sealer, have harnessed the potent power of airlessness.
Choosing the Right Mason Jar Vacuum Lid
Let’s get a lid on your food preservation needs! When you’re in the trenches of sealing in that freshness, it’s not just about tucking away your edibles – it’s about doing it smartly. With the right Mason jar accessories, such as vacuum lids, you’re practically a pro at this. But here’s the crunch – selecting vacuum lids is as important as the food you’re preserving.
Compatibility with Various Jar Sizes
You know the drill: not all Mason jars are created equal. The nifty thing is, quality vacuum lids come ready to tackle different sizes like a champ. Whether you’re packing Grandma’s pickles in a regular jar or your famous berry compote in a wide-mouth, make sure the lid you choose plays nice with both.

And let’s be practical – you don’t want to be in the business of trust issues when it comes to sealing in food. Opt for trusted canning supplies that guarantee an airtight seal because, let’s face it, no one likes a pantry surprise gone wrong. Here’s a little pro tip: always perform the “fit test” before you buy, ensuring that your vacuum lid forms the perfect food fortress.
Quality Brands for Long-Term Use
Now, onto the heavyweights in the world of canning – the brands that have sworn to protect your produce with their lives. Names like FoodSaver are the Gandalfs of your pantry adventure, bringing you safe passage into the land of long-term storage. Investing in a reputable brand isn’t just about making your shelves look snazzy; it’s a pact with persistence.
Bottom line? Don’t play roulette with your dry goods. Practice savvy shopping and choose vacuum lids that have as much staying power as those jams you plan to devour in the wintertime. So go ahead, get those long-lasting Mason jar accessories, and turn your pantry into a homesteading hall of fame!
How to Seal Jars with an Electric Mason Jar Vacuum Sealer
Got your Mason jar and metal lid at the ready? Good. Now, prepare to transform the way you preserve foods with the magic of electric jar sealing. Engage in this sealing process guide, and let the FoodSaver vacuum sealing charm your pantry essentials into lasting fresher, longer. Ready, set, seal!
Step-by-Step Sealing with a FoodSaver
Embarking on this adventure doesn’t require a wizard’s spells. Just a FoodSaver vacuum sealer, your trusty jars, and a desire to shield your food from the terrors of spoilage. Here’s your map to treasure:
- Place those delectable items into your Mason jar. Remember, if you’re dealing with the likes of flour or spices, a knight in the form of a coffee filter or paper towel on top will defend against unwelcome clogging.
- Position the metal lid on your jar with a precision only matched by the best archers of the realm to ensure it’s centered.
- Unsheath your FoodSaver, positioning the hose firmly atop your jar’s lid, and use the Canister mode to activate the sealing spell automatically.

Considering that your sealed jars will act as mini fortresses for your food, these steps are your soldiers ensuring the safety of the kingdom (your pantry, that is).
Troubleshooting Common Sealing Issues
Faced with a rebellious jar that refuses to seal? Don’t despair. Here’s a troubleshooting table, your trusty axe in the battle against sealing issues:
| Problem | Solution |
|---|---|
| Lid isn’t sealing | Check for any food residue on the jar rim, and ensure it’s as clean as the royal crown. |
| Lid is defective | Inspect the integrity of your lid – no cracks, no defects, no exceptions! |
| Attachment misalignment | Double-check that your FoodSaver attachment is properly positioned, like a knight in its rightful spot on the chessboard. |
Rest easy knowing that with these tips, you’re well on your way to a bounty of beautifully sealed jars, ready to stand the test of time in your pantry’s armory.
Alternatives to Electric Sealers: Oxygen Absorbers

So you’ve ditched the electric sealer or maybe you never had one to begin with? Kudos for keeping it simple. But let’s face it, your pantry doesn’t care about your minimalist lifestyle; it just wants to keep your food fresh. That’s where non-electric sealing options come in handy. Have you ever considered using oxygen absorbers for food storage? They might just be the low-tech superheroes you’ve been looking for.
Here’s a little secret: food storage with oxygen absorbers is like sending your grains, legumes, and spices off to a spa retreat; they come out rejuvenated, have a longer shelf life, and are ready to face the world—or at least your next recipe—with freshness and vigor. The process is a piece of cake. Drop an absorber into your Mason jar amidst your dry goods, screw on the metal lid (tight, but not Hulk-tight), and voilà, you’ve got yourself an airtight sanctuary.
Check out these nifty DIY vacuum sealing tips that even the FoodSaver gurus nod approvingly at:
- Size matters: Choose an oxygen absorber that matches the volume of your jar. You don’t want to overdo or underwhelm.
- Timing is everything: Once you’ve opened a pack of absorbers, they start working their magic. So only take out what you need, and seal the rest back up pronto.
- Seal the deal: After you’ve placed the oxygen absorber and tightened the lid, store your jar away from direct sunlight. Pat yourself on the back; you’re now a food storage savant.
And there you have it, a perfect storage solution without an outlet in sight. You’ve got the power—in your hands, quite literally. Goodbye electric bills, hello happy pantry!
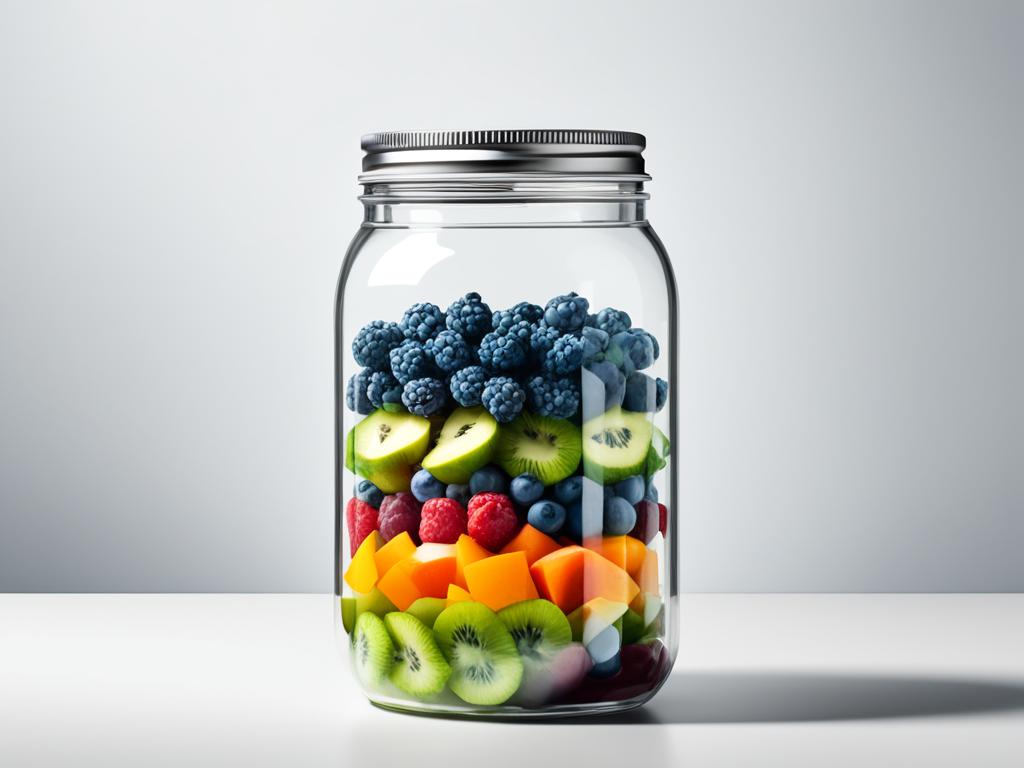
Mason Jar Vacuum Sealer: The Essential Companion for Dry Goods
Whether you’re a culinary expert or a meal prep novice, mastering the art of storing your pantry staples can be a cinch with a Mason jar vacuum sealer. Not only does it lock in freshness and flavor, but it’s also your best defense against the relentless march of time and the spoilage it brings. If you’re looking to become a pro at preserving everything from your grandma’s dried apricots to your go-to morning granola, buckle up, because you’re about to get a crash course in food saving finesse.
Best Practices for Sealing Dried Fruits and Vegetables
Let’s talk dried fruits and veggies. These snacks are already champions of the shelf-life game, but with your vacuum sealer, they’re virtually unstoppable. Here’s a quick tip: slide a coffee filter over the mouth of the jar before sealing. This little hack keeps fine particles in check, so they don’t interfere with your seal’s integrity. Trust us, there’s no sorcery here—just good, old-fashioned ingenuity at work.
Ensuring Airtight Seals for Cereal and Grains
And for the beloved cereals and grains? Here’s where the magic happens. Use your FoodSaver or, if you like to kick it old school, a manual hand-held brake bleeder—yes, you heard that right—to suck out all the air and create an airtight haven for your pantry essentials. You’ll almost hear your kernels of quinoa thank you for their pristine storage conditions.

Below is a table of dry good storage solutions for your pantry items, crafted to guide you through the various effective sealing techniques for commonly stored pantry items using a Mason jar vacuum sealer:
| Food Item | Vacuum Sealing Technique | Tips for Optimal Storage |
|---|---|---|
| Dehydrated Fruits & Vegetables | Use a coffee filter barrier | Prevents tiny pieces from interfering with the seal |
| Cereals & Grains | Use a FoodSaver or hand-held brake bleeder | Ensure container is completely dry before sealing |
| Herbs & Spices | Seal with low vacuum intensity | Avoid crushing delicate herbs |
| Nuts & Seeds | Include oxygen absorbers | Extends shelf life by preventing rancidity |
Remember, keeping your pantry organized isn’t just about making things look pretty; it’s about maintaining nutrition and taste while waving goodbye to food waste. Consider your Mason jar vacuum sealer your trusty sidekick in this noble endeavor. Ready to seal the deal? Go forth and keep those pantry items pristine—a food saver’s work is never done!
Using Brake Bleeders for a DIY Vacuum Seal
When the grid is down or you’re just feeling the itch for some self-reliance, the savvy preserver like you knows how to keep the pantry full. Cast aside your reliance on electricity and explore the world of manual vacuum sealing with a device you’d least expect—the brake bleeder. Yes, you read that right; it’s not just for car garages anymore.
Understanding the Mechanics Behind the Method
So, what’s the big idea? The brake bleeder vacuum method might seem like it’s straight out of a MacGyver episode, but it’s a practical, hand-powered approach to storing your goodies. The technique leverages the power of a brake bleeder’s vacuum capacity to whisk away air from your precious Mason jars. It’s like giving your legumes, pasta, or dried herbs a vacuum-packed coat for the winter, but with a tool typically used for automotive upkeep.

Necessary Equipment for the Non-Electric Approach
For this bit of off-grid ingenuity, you’ll need your trusty Mason jars and lids, a brake bleeder, and a special vacuum lid attachment that cozies up to the brake bleeder. You’re essentially doubling down on the old adage: use what you have to seal what you’ve got.
| Equipment | Role in Manual Vacuum Sealing | Why It’s a Smart Choice |
|---|---|---|
| Brake Bleeder Kit | Creates the vacuum suction needed to extract air | Repurposes a common tool for off-grid food preservation |
| Mason Jar Vacuum Lid Attachment | Connects brake bleeder to Mason jar lid | Adaptable to various jar types and sizes |
| Mason Jars and Metal Lids | Houses and seals the food items | Reusable and durable for long-term storage |
Roll up your sleeves, because with this lineup, you’re about to become a preservation maverick, sealing sustenance with the gusto of a gourmet and the grit of a gearhead. Cherish the charm of this throwback technique, and let your handiwork talk the talk as your sealed jars walk the long walk through storage seasons.
Maintaining Your Vacuum Sealed Jars
So, you’ve become a pro at using your trusty vacuum sealer, and your pantry looks like something out of a home organization TV show. But the fun doesn’t stop with sealing those jars; keeping an eye on the integrity of your seals is critical for ensuring your food stays as fresh as the day it was stored. Proper maintenance is not just neat, it’s necessary. Let’s dive into the world of checking jar seals, opening vacuum sealed jars, and maintaining sealed foods.

How to Test and Confirm a Proper Seal
You might believe that a vacuum-sealed jar is invincible, but even the best-sealed goods need a little check-up now and then. Give that lid a gentle press in the middle; a lack of movement suggests your seal is still playing bouncer to bacteria and oxygen. Go ahead, try picking up the jar by the lid—if it holds, do a little victory dance. You’ve got a seal that’s tighter than a drum!
Breaking the Seal: What You Need to Know
Now, let’s say it’s time to dive into those delicious preserved treats. You’ll need to understand the art of breaking the seal without turning your lid into a mangled piece of metal. Use a spoon or a bottle opener and apply gentle leverage to let the air rush back in. It’s a moment of suspense followed by that satisfying ‘pop’—music to a food preserver’s ears. But remember, once opened, eat those goodies promptly or store them with proper refrigeration.
| Seal Checking Method | Expected Outcome | Maintaining After Opening |
|---|---|---|
| Press the center of the lid | No movement indicates a strong seal | Consume quickly or refrigerate after opening |
| Lift by the lid without the band | Holding firm means the seal is secure | Use within recommended shelf life |
| Use a butter knife or bottle opener to gently pry open | Should open with a ‘pop’ | Inspect and clean the jar before resealing |
And there you have it—your guide to checking jar seals, opening vacuum sealed jars without a hitch, and maintaining sealed foods like a pro. Stick with these pointers, and your pantry’s shelf-life game will be strong. Keep it sealed, keep it real!
Conclusion
Mastering vacuum sealing is like unlocking a secret level in the game of kitchen prowess, where the reward is the extended enjoyment of your pantry favorites. The Mason jar vacuum sealer is your trusty sidekick in this quest, protecting dearest dried herbs and cherished chilis from the dreaded clutches of staleness and spoil. Whether you’re wielding an electric sealer like the FoodSaver, embracing the minimalist approach with oxygen absorbers, or powering through with a DIY brake bleeder setup, optimizing food storage has never been so slick.
Now, let’s talk about keeping that treasure trove of tongue-tantalizing treats in tip-top shape. Testing your seals isn’t just a good practice—it’s the hallmark of a home canning connoisseur. And when it comes to accessing your well-preserved bounty, knowledge is power. You’ll be breaking seals like a pro, with no fear of tainting your goods or turning that sweet sugar into a culinary cinder block.
Your foray into the world of vacuum sealing doesn’t just bode well for your munchies; it’s a firm step towards reducing waste and embracing sustainability—one jar at a time. Armed with the home canning essentials, you’re not just optimizing food storage; you’re orchestrating a symphony of sustainability that Mozart would envy. So go forth, seal with confidence, and may your foods stay as fresh as your food-saving skills.
FAQ
How do you vacuum seal a Mason jar?
To vacuum seal a Mason jar, you’ll need a vacuum sealer machine with a hose attachment and a Mason jar vacuum lid. Simply place the lid on the jar, attach the hose, and use the sealer’s vacuum function to suck out the air and create an airtight seal.
Why should I use a Mason jar vacuum sealer for food preservation?
A Mason jar vacuum sealer extends the shelf life of your dry goods by creating an airtight seal that keeps out air and bacteria. This means your pantry items stay fresher longer, reducing waste and saving you moolah!
What are the benefits of vacuum sealing my food?
Vacuum sealing your food helps to preserve freshness, extend shelf life, and prevent freezer burn. It’s a fantastic way to bid adieu to food spoilage and hello to a sustainable, organized pantry.
Can I vacuum seal liquids in Mason jars?
It’s not recommended to vacuum seal liquids using a Mason jar vacuum sealer, as the process is typically designed for dry goods only. The presence of liquids can interfere with the seal and compromise the safety and effectiveness of the storage.
What sizes of jars can be sealed with a Mason jar vacuum sealer?
Mason jar vacuum sealers are versatile and can often handle various jar sizes, from pint-sized regular mouths to quart-sized wide-mouth jars. Just ensure you have the correct vacuum lids for each jar size.
Are all brands of Mason jar vacuum lids compatible with my vacuum sealer?
Not necessarily. It’s essential to choose vacuum lids that fit your specific vacuum sealer model and jar size. Brands like FoodSaver offer a range of lids compatible with their sealers and various jar sizes.
What do I do if my Mason jar isn’t sealing properly?
If you’re encountering sealing issues, check for any debris on the jar’s rim, ensure the metal lid is free of defects, and confirm that the hose and sealing attachments are correctly placed. Sometimes, the simplest solution is the key to troubleshooting!
Are there any non-electric methods to vacuum seal Mason jars?
Absolutely! If you’re without a FoodSaver, oxygen absorbers are a great electric-free alternative. These handy little packets absorb all the air in the jar, and when paired with a tight-fitting metal lid, they create an airtight sanctuary for your dry goods.
How should I store sugar using a Mason jar vacuum sealer?
Sugar and other fine grains should be stored carefully, as vacuum sealing can sometimes turn them into a solid block. Consider using oxygen absorbers for these items or just ensure they’re kept in a cool, dry place with a tight-fitting lid.
Can I use a Mason jar vacuum sealer for off-grid living?
You definitely can! For those living the off-the-grid fantasy, a manual brake bleeder kit can serve as a DIY vacuum sealer. It uses good ol’ fashioned elbow grease and mechanical suction to get that air out and keep your foodstuffs in tip-top shape.
How do I ensure an airtight seal when vacuum sealing?
Ensuring an airtight seal is as simple as checking that the lid doesn’t move when you press it in the center. For extra credit, try lifting the jar by the lid—the band should stay put if the seal is tighter than a drum!
How can I open a vacuum sealed Mason jar without damaging the lid?
To open your vacuum sealed vault of freshness without ruining the lid, use a bottle opener or butter knife to gently pry the edge of the lid. Apply minimal force to avoid any heartbreaks for your lid—and fingers!